¶ The First Tutorial
You now have enough knowledge I can show you how to complete a simple task from start to finish. This is not just practice, they'll be explanations on lots of functions and coding that we haven't covered yet. Here is the task: Make a game with a player that can move in 4 directions (2-D) with the arrow keys. Here are the steps:
- Create a new project
- Create a player sprite
- Create a player object
- Add events to the player for each of the 4 arrow keys
- Code the events to set the
speedfor the player - Create a room to move around in
- Place the player object in the room
- Test the game
Okay, let's go. Open GameMaker Studio 2. Go to File>New Project. Create a player sprite, remember that is done by right clicking on the sprite resource and hitting create.
![]()
You should have a screen that looks like this:
![]()
Change the name of the sprite to spr_player. spr standing for sprite of course, player being the name of the sprite. We'll leave the size as 64X64 to make things easy. Hit edit image. The sprite editor runs pretty much like an MS Paint program or something of the like. Use the paintbrushes, drag circles or rectangles, change colors. You can read more about the editor here if you want to go more in depth. I just made my player a circle, like this:
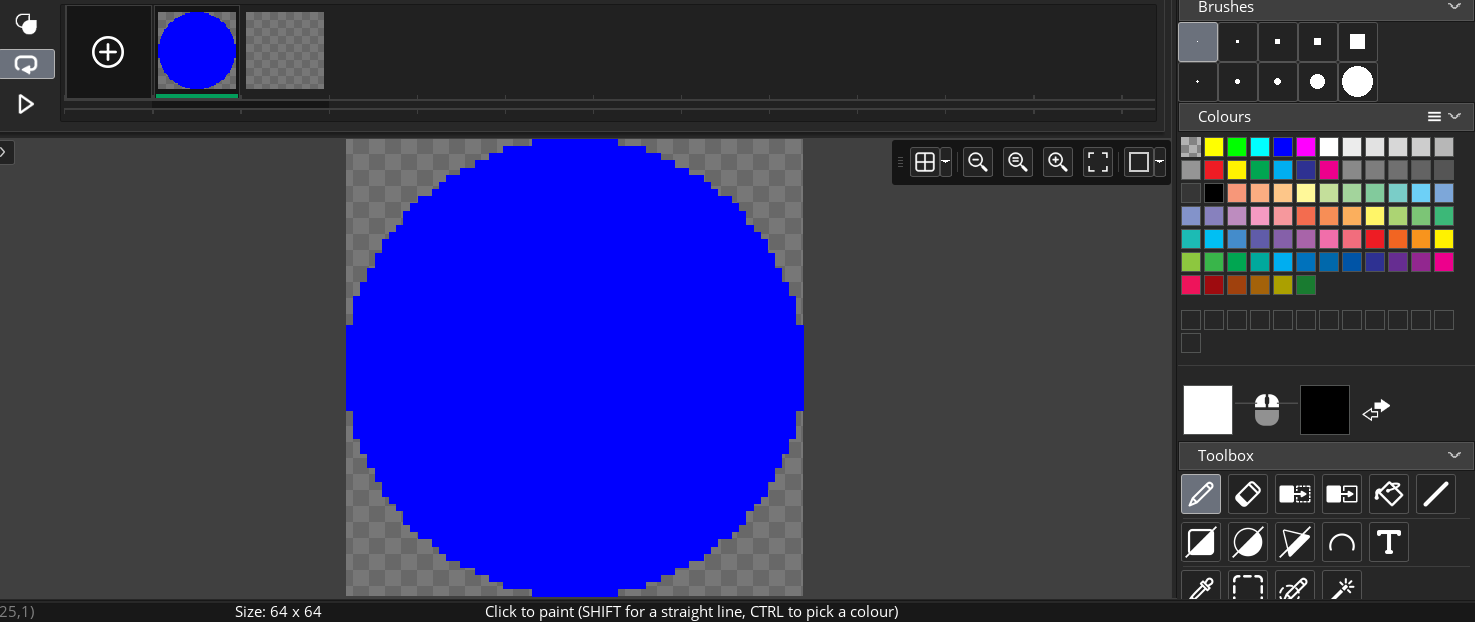
Easy peasy.
You can exit out of those, they'll save automatically. Next create an object and call it obj_player. Also set the sprite of the object to be spr_player, the sprite we just made.
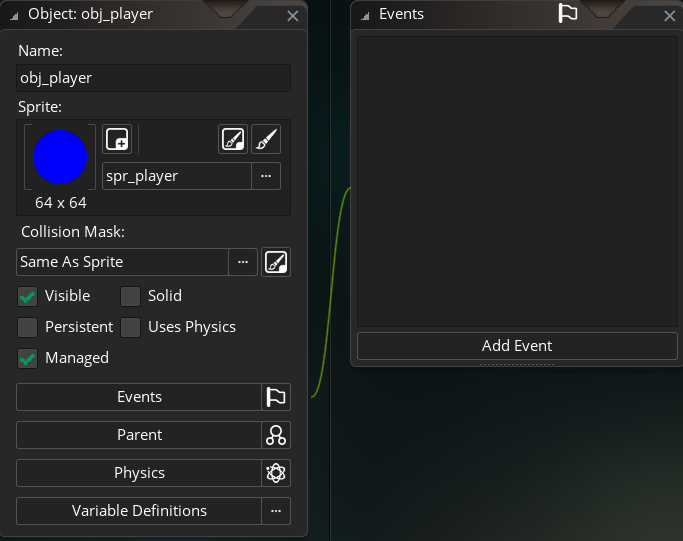
Great. Now you can see the add event button. You'll recall we need some place to put our code, and that will be in these events. We ask ourselves when we want our code to be executed. In this case, the answer is whenever the user hits any of the arrow keys. Specifically, whenever they are holding down on the key. It makes sense that we use the key down event for this. If that doesn't make sense click here.
We'll start with key down> left. Change the text following the @description to be Move left so we know what this event is doing. How do we make the player go left? We can set its hspeed a built-in variable controlling how many pixels the object moves horizontally each step. Let's say we want it to go 5 pixels each step. We'll type hspeed = -5. Why negative? Here's why:
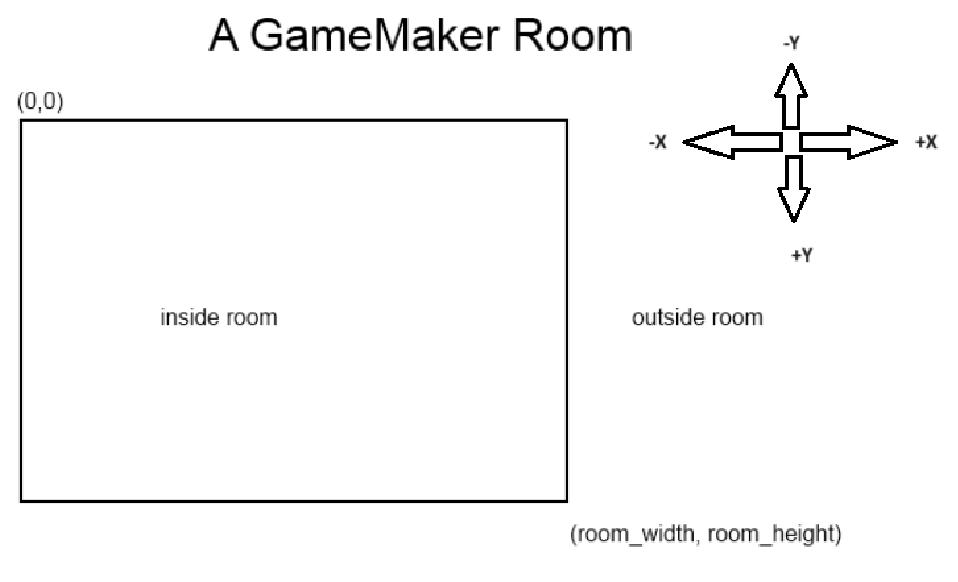
So since we want to go left we need to move in the negative x direction. Our code should look like this:
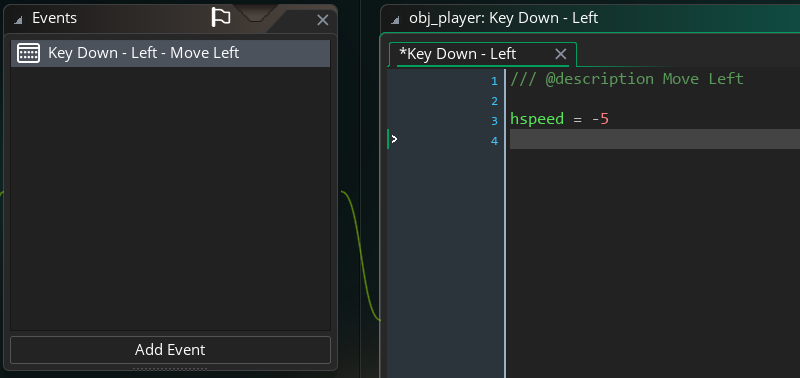
How about the rest? As you can guess, we just repeat for right using hspeed = 5. The same is done for up and down but using vspeed for vertical speed instead of hspeed. Once we're done with that we need one more thing. Making the player stop.
To do this we use a different event key up> Left which runs the code whenever the left arrow key is released. In here we just set hspeed = 0. We'll do the same for right, up and down. For key up>Up and key up> Down you'll use and vspeed = 0 instead. Your object should look like this:
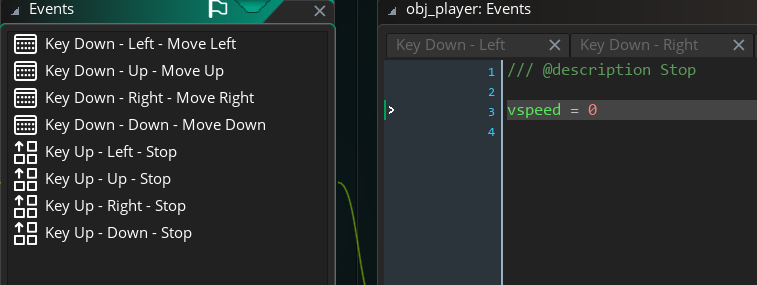
And you're done! Well almost. All you have to do now is create a room, like you did the object and sprite. Then drag the object from the right side into the room. If it doesn't work make sure you have the "Instances" layer selected on the right side.
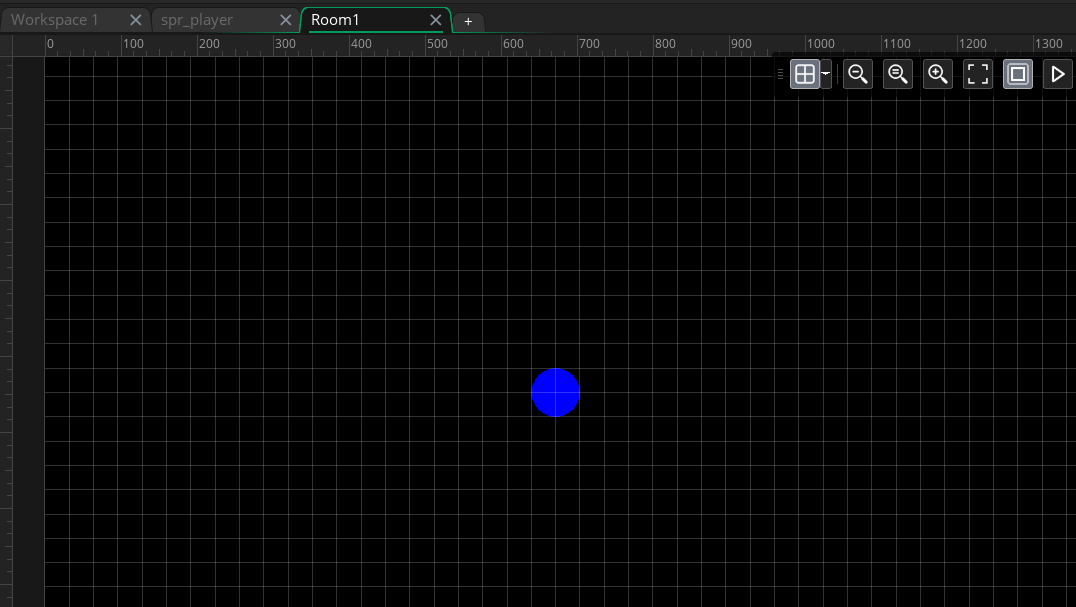
Now you're ready, hit F5 or the run arrow in the top middle of the screen to run it. Can you move? Does it stop? If so, congrats! If not read the tutorial again and see where you went south.
¶ Tutorial Part 2
Okay, the first part was fairly easy. Now things are going to get a little trickier. We are going to continue our tutorial in the same game, but now we are going to make the player shoot a bullet the direction the player is facing whenever the space bar is pressed. To make it even harder, the bullet sprite won't be a circle, so we'll have to make it point the direction the player is moving! Let's get started!
What we need to do:
- Create bullet sprite(s) pointing all 8 directions
- Create bullet object
- Type creation code for bullet into a space bar event
- Make the bullet move the direction the player is moving
- More stuff you'll see as we go
Alright, first create the bullet sprite, you will get good at making sprites pretty quickly. This sprite we'll call spr_bullet remembering to always include the suffix spr_ so we know it's a sprite. The bullet aught to be smaller than the person so let's change the canvas size to 16X16, on the left. If you wanted to stretch a sprite you already made, you would scale the image.
Good. Now let's make a bullet pointing right. My bullet is simple enough but points a definite right, which is what we want here.
Great! Now as long as we only fire right we'll be good to go. Unfortunately we should play it safe and make a few more directions. To do this, we'll be adding new frames to this sprite. You can do this by clicking:
.
That button. Now to rotate the sprite, we can just select it using the rectangle select tool on the left, copy it, go to the new frame, and then use the rotate brush tool. Rotate it 45 degrees, click on the pencil again and carefully place it. Okay, now do that 6 more times until you have all 8 directions. I recommend rotating the first bullet 8 times instead of one after the other so it doesn't get too blurry. Now your sprite should look like this.
Bullet sprite done. Now make a bullet object called obj_bullet and set the sprite to be spr_bullet. I trust you can handle that so no picture for you. Now try placing a obj_bullet in the room and hit play. A few problems here.
- Our bullet is black and the room is black, so you can't see it
- The bullet is spinning
Solution to 1. is to change the background color of the room. You might have to go to room>layer properties, or hit ctrl-alt-p to see the window below.I made my background a nice grey.
Solution to 2. is to add a line of code to set the image_speed = 0. The image_speed is how fast the sprite cycles through its frames. Where will we put this code if we want it to happen right away? The Create event! Here we go.
Hopefully you noticed that image_speed turned a light green. This is called syntax highlighting. All built-in variables in GMS 2 will highlight green so you know GameMaker already has a purpose for that variable and not to make your own variable that same name.
Now that our bullet is no longer spinning, it's time to get the player to create the bullet, instead of placing it in the room. No worries, the Create code we wrote will still work, it will just run when the player creates the bullet instead of when the room creates the bullet.
Our bullet creation is happening in the Key pressed>Space event of the obj_player since the player is creating the bullet. We'll use the built-in instance_create_layer() function we used once before which accepts (and requires) four parameters. These are the x and y coordinates to create the object at, the layer which is kind of the third dimension for the object, and finally the name of the object to create. Our function will look like this:
instance_create_layer(x, y, "Instances", obj_bullet)
The x and y means the obj_player's current x and y. Play the game and make sure your character can create bullets with the space bar.
You'll notice the bullets create in the top left corner, that's because the (0,0) coordinate for objects are in the top left. To fix make the bullet create in the middle, we'll just add 32 (half the player size) to the x and y coordinate.
instance_create_layer(x + 32, y + 32, "Instances", obj_bullet)
Now let's make the bullets move. This is a little tricky. We need a new statement, the with statement.
¶ The With Statement
with is a special keyword in GameMaker that essentially moves the code over to a different object. If you say in obj_player:
with (obj_bullet){
    x = 5
    y = 5
}
That will set the bullets x and y coordinates to 5, not the player's, even though this is occurring in the obj_player. This is because the with statement makes obj_bullet the owner of that code. This is useful when you want to refer to a specific instance of an object, that is just one bullet instead of all bullets. Place the with statement in front of the creation code and voila! you've got code that applies to just one instance of the bullet instead of all of them.
Okay back to it. We'll apply this magic to our code to get with instance_create_layer(x + 32, y + 32, "Instances", obj_bullet){. Now what do we want to change about this particular obj_bullet`? Well we want it to point the direction the player is moving. To do this we need to know which direction the player is moving (or last moved). Let's go over to our movement events to change this.
First though I have a confession to make: I told you a crappy way to get the player to stop. I'm sorry.
We made it so when the user releases any key the player will stop. But now we're using the space bar! Do we want the player to stop whenever we release the space bar? No. Let's change this. We'll make it whenever the arrow keys are released they stop moving the direction the arrow key was moving them. As such:
So our left and right Key up events set hspeed = 0 and our up and down Key up events set the vspeed = 0. Disaster averted. As you code more, your foresight for these issues will get better.
Back to the movement events. In the Key down>Left event, let's set a variable to tell us the player is pointing left: xdir = -1. Let's do the same for right, up, and down with xdir = 1, ydir = -1, and ydir = 1. We'll also set xdir to 0 when we release left and right and ydir to 0 when we release up and down. Now we know which direction the player is pointing at all times.
So back to our with statement.
with instance_create_layer(x + 32, y + 32, "Instances", obj_bullet){
    image_index = ???
}
image_index is which of the bullet sprites we'll be using. 0 is right, 1 is right and downward, 2 is downward, and so on. To get it to create the right sprite we need to associate the values xdir and ydir with the values 0-7. There's a few ways to do this but we'll use a script for practice. Create a script, rename it scr_find_direction and set it up like this:
Sorry for all that typing but I hate to tell you that's not a huge script (although it is hugely inefficient). Now we can finish our with statement. All this does is return the correct image index depending on the xdir and ydir.
Let's look at this. First we set the image_index to our function we wrote. We have to specify obj_player.xdir and objplayer.ydir because the with statement means this code is executed by the obj_bullet. You could also use the other keyword. Same for setting the bullets hspeed and vspeed. Now we have bullets that create pointing and moving in the right direction! Test it out. It's not perfect because we handled the direction setting for the player kind of shoddily, but it still works.
Quite a few problems still.
- When you're not moving the bullets don't move
- The bullets are never destroyed, so if you play long enough they will slow down the game
However I'm going to call that enough for this tutorial. We covered a lot. Did you understand it all? If not, it's okay, do some research, figure things out. Keep coding!